Mind The Gap
The key to automated gap and flush measurement
Measurement of the gap and flush between adjacent panels of an assembled object is often required to meet both aesthetic and functional specifications. In automotive body assembly, having proper gap and flush between various panels (Figure 1) is critical. For proper appearance, the gaps must be both small and uniform and flush deviations between panels must also be very small. In addition to aesthetic requirements, out of tolerance gap and flush conditions can result in excessive wind noise and water leaks, leading to expensive repair and warranty costs. Typical automotive specifications allow variations of only 0.5 to 1mm from nominal values.
Traditionally, gap and flush measurements have been done manually with various types of mechanical hand held probes. Manual measurement has a labor cost, and is subject to measurement error if the mechanical probes are not properly oriented or applied. Assemblers have stated a desire to measure 50 points or more on every vehicle produced, which is not achievable with manual probes at typical line speeds.
Gap and flush is a 3D application requiring profiling of curved edges. Using 2D sensing cannot provide the necessary measurement data.
The key enabler for automating reliable gap and flush measurement is 3D sensing. Using a laser line profile sensor provides detailed contours of the interface between adjacent panels, allowing accurate measurement of both gap and flush in a single image. Although 3D sensing is often considered complex to configure and integrate, latest developments have made implementation simpler, even for those with limited experience in laser line sensors.
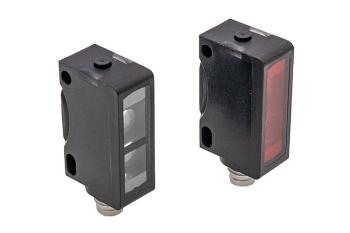
Today, a new category of 3D smart sensors with all-in-one operation provide the solution to easy implementation of automated 100% in-line gap and flush measurement. Under the trade name of Gocator, these sensors are designed for general purpose factory automation and control applications. These factory calibrated sensors have all optical components (laser, optics, imaging camera, electronics etc.) rigidly mounted inside a compact, lightweight IP67 rated enclosure. In addition, all image acquisition and analysis hardware and software are inside the sensor housing.
Megapixel Imager
The 3D sensor used in gap flush applications uses a megapixel imager to provide micron level measurement resolution to meet tight tolerance requirements. The gap flush sensors feature a built-in web server, compliant with standard browsers, to deliver a responsive, effective user interface experience. Simply connect any computer to the sensor, open a browser and use the intuitive, multi-language interface to configure all sensor functions such as exposure, active area, triggers and communications.
The sensors include a comprehensive set of built-in measurement tools for computing measurement values such as length, width, height, groove locations and many more. Simplicity of setup benefits end users with minimum maintenance and avoids costly system integration. For gap and flush measurement applications, measurement tools are included specifically designed to meet current automotive industry specifications. On setup, the nominal part geometry values for each specific measurement point as well as maximum/minimum tolerance limits are entered. Thousands of configurations can be stored and recalled. This accommodates the many variations in geometries between different panels (doors, hoods, deck lids etc.) as well as the need to make measurements between panels and trim components (lamp housings, fascia etc.)
A further complication in implementation is that measurement of gap and flush is frequently done after vehicles are painted. This can be challenging for 3D sensors because some measurement points need to be taken on vehicles of different colors. Different colors have different reflectivity, which can affect sensor operation and accuracy. For example, a significantly different exposure is needed to precisely measure a white vehicle compared to a black vehicle. The solution is use of the dynamic exposure mode built into the sensor. This feature automatically optimizes exposure for each surface condition.
The 3D sensors support a variety of standard protocols for communication with the cell controller. Ethernet is commonly used, and the sensors also support Modbus/TCP and certified EtherNet/IP protocols for PLC based systems. Information sent to the cell controller for each measurement point can be pass/fail decisions, as well as individual measurement values for SPC analysis to monitor the assembly process. Additionally, an open source software development kit (SDK) is available for engineers who want to do their own programming.
Specific measurement points
Most automotive assembly lines are flexible, able to assemble a number of models, each having their own specific measurement points. To accommodate gap and flush measurement on different models, the lightweight compact sensor is mounted on the end effector of an industrial robot, programmed to move the sensor to each measurement point for each model. Since gap and flush measurements are relative, a high precision robot is not required.
In many assembly plants, the line is continuously moving at the location where gap and flush measurement is required. The high speed of the 3D sensor provides reliable measurements even when the bodies are in motion.
Gocator 3D sensors, with web browser interface and built-in measurement tools provide easy to implement high accuracy gap and flush measurements. Mounting the sensors on a robot provides flexibility, and capability to achieve 100% in-line measurement at 50 or more points for each vehicle produced, even on moving assembly lines.
Contact
LMI Technologies Inc.
9200 Glenlyon Parkway
V5J 5J8 Burnaby
BC, Canada
+1 604 636 1011
+1 604 516 8368


