Versatile Use of 3D Cloud of Points Analysis
What Teeth, Cars, Ice Cream and Sausages Have in Common …
Regardless of whether uniform portions of sausage, cheese or ice cream are required in the food industry, economical and absolutely precise testing of components in the automotive industry or micro-precision fitting accuracy for dental prostheses - the SAL3D library from the Spanish software company, Aqsense, guarantees quick and precise capture of three-dimensional objects using 3D point clouds.
Imagine a delicatessen producer wanting to fill precut halves of coconut shells automatically with ice cream on a mass production line. Of course each of these naturally grown ice cream shells are unique in size and form, each with a slightly different shape and holding capacity. Nevertheless the filling height and quantity of ice cream must correspond to a defined model, describing a standard half-shell and defining the possible tolerance range for filling. Since production is to be accomplished on a conveyor belt, this measuring pro-cess must be completed quickly and it should also be associated with minimum effort and cost. This is exactly where SAL3D from the Spanish provider, Aqsense, excels. SAL3D is a modular, standard software library for 3D image processing applications, which is completely independent of any specific hardware platform. Based on point cloud coordinates it provides an extremely accurate, digital 3D model of any object measured. In simpler terms this means in our coconut example: Based on a laser sheet-of-light method 3D data of the object are calculated and thus a precise 3D image of the object right down to the smallest detail is generated. The ice cream manufacturer is now able to automatically classify the coconut shells delivered into eight different volume classes. This classification allows the machines to fill in precisely the right quantity of ice cream without any further manual intervention. The advantage: This process eliminates any waste of ice cream and produces finished shells which appear uniform to the eye of the customer. Previously the shells were sorted manually and this only allowed classification into three volume sizes. The new technology, industrially implemented by Baixcat, system integrator out of Girona and Aqsense´s partner in 3D applications, immediately reduced the error and reject quota. „This example shows, in a simple and graphical way, the performance capabilities and variety of applications for our proven SAL3D tool set," stated Ramon Palli, CEO of the innovative company out of Girona, Spain. Aqsense has been present on the market since 2006 with standard software libraries for 3D image processing applications and is today the only software supplier to offer a high speed, precise and robust tool for real 3D point cloud recognition and processing in production environments. The company offers mature, high-tech, practice-proven solutions and is proud to support customers with practice-oriented knowhow, detailed consulting, feasibility studies and training as well as intensive aftersales support to ensure perfect and successful integration of the 3D applications into existing production processes.
No Matter if Fish or Fowl....
Staying in the field of food, further examples of the many flexible applications for this library can be provided. For instance in the portioning process for food, when foodstuff has to be processed that differs in form and structure. This is true for almost all nature-based food provided to the customer in a packaged or refined form: sausage, ham, fish, cheese and so forth. None of these products have a standardised size in their raw format. Portioning and cutting have to therefore "naturally" follow a similar concept as mentioned before. Here again the basis is a measuring process for determining the volume of a body: The cross-sectional area of the product, i.e. a fish or a ham, is measured as it moves along a conveyor belt. The cross section area is determined and provides precise information about the volume of the body. Once the predefined weight of a portion is reached, the cutting machine seperates that particular portion. This avoids the otherwise common practice of „overfilling" the sales package and is thereby saving costs.
Implementation requires consideration of a series of high requirements, because no two fish or hams are like two peas in a pod. Thus, it is necessary to calculate the cross-section on the basis of a number of height profiles. These requirements can be solved with the aid of three cameras and the laser light intersection method. The cameras record different views of the object illuminated by laser lines, while it is located between two conveyor belts. Comprehensive measurement is accomplished here within seconds.
Independent calibration of the three camera/laser combinations is ensured by a special, precision manufactured calibration element. Only this guarantees that the measuring range of each individual section is defined precisely and nothing is captured twice.
The high performance SAL3D software is predestined for performing such calculations in real time in industrial surroundings. Detailed simulations are made by Aqsense at the request of the customer before starting the project to ensure that the measured results and performance parameters will meet the requirements.
Perfection from One Mold
The advantages of this measuring pro-cess have already been recognized for some time in the automotive industry. Because in the automotive field precision, use of absolutely defect-free components and rapid inspection processes are of utmost importance to satisfy the high safety requirements of the automobile while simultaneously producing profitably. A particular challenge here, for example, is quality control of cast parts, such as cylinder heads or brake discs. These cast parts, supplied directly from the foundry, may have defects such as air inclusions, irregularities or excess material.
Today such parts are still tested visually on a random sample basis. However, visual inspection poses the danger of not sorting out all parts with defects. This, on the other hand, increases the risk of having to disassemble the components in a time-consuming process at a later stage in the assembly process, thereby reducing the productivity of the production process. An automatic inspection system was developed which is capable of testing all constituents of a complex cast part at the very beginning of the assembly process using 3D cameras in combination with the SAL3D software library. The cast part is transported by a conveyor belt or a linear shaft below a system consisting of 3D cameras and a laser. To avoid shadows on the cast part - and therefore missing surface information - two cameras are used for each view.
Here the 3D software tools developed by Aqsense allow metric calibration and consolidation of the images from the two 3D cameras to form one single, calibrated 3D image. The next step is access to the 3D library to compare the 3D scan of the cast part with the reference model stored on the computer. The deviation test leads to the decision whether or not the scanned part is within the quality specification. A comprehensive 3D scan, the analysis of one million 3D points and the go/no go decision are reached within less than one second. This means the inspection system is capable of a fast and absolutely reliable 3D inspection of complex cast parts - in glaring contrast to the previously common visual quality control on a random sample basis. This 3D process also significantly reduces the mechanical effort required for precise part positioning and guarantees high throughput while completely inspecting all parts. Edixia, leading French producer of inspection systems for the automotive industry, was able to build a quality control system based on the speed of the Match3D tools for 3D position compensation and 3D defect recognition for 100% inspection of the six sides of a cylinder head within the given cycle time of only 11 seconds.
Faster Processes
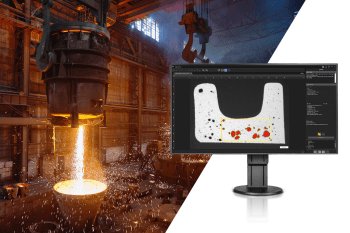
A further application for point cloud analysis based measuring equipment in the automotive industry is for checking body parts for faults and dimensional accuracy immediately after metal forming in the press plant. A prototype for this application was developed for BMW in a cooperative effort between Aqsense, Photonfocus and Heitec, which successfully proved the technical feasibility of such a concept. Here analysis of the point clouds provides for exact measurement of complex 3D free-forme surfaces and comparison between the design and actual shape of the part. After 3D positional correction, the actual shape of the object to be inspected is first determined and then compared with the „golden template," a 3D image of a good part. Even minor deviations in the dimensions can be recognized by this real time process, allowing rapid qualitative evaluation of the object. This procedure provides a decisive advantage particularly in industrial production processes since the immediate recognition of defective components is mandatory to ensure smooth operation while simultaneously maintaining high quality. Only such an absolutely reliable test ensures proper control of the process while allowing immediate intervention if defects occur repeatedly. Only in this way refinishing work in the production process and the resulting loss of time can be avoided and productivity can be maintained at a high level.
The Right Bite
Another market segment where precision and accuracy are of high significance is the wide field of dental medicine and technology. Here even extremely fine deviations determine whether a dental prosthesis fits correctly and is comfortable for the patient, or whether cost-intensive, manual re-work is required. This means that comparison with the dental imprint taken on the patient (reference model) is particularly important when making a prosthesis or partial prosthesis. „In addition to precision, the processing speed is a key factor for the success of the SAL3D standard software library in this market segment," remarked Palli. Here the speed of the SAL3D ensures quick and precise adaptation with the aid of the 3D scan. This is the major prerequisite for the production of a 3D model, which can be converted into a CAD design for controlling production of the dental prosthesis. If this procedure becomes established in dental laboratories, a few image acquisitions will be all that is required to create an exact image and significantly shorten the production time. Because the three dimensional comparison with the stored reference model not only saves time during production, it also frequently eliminates subsequent touch-up work and repeated fitting work on the patient completely.
In conclusion it can be said: Regardless of whether dental technology, food industry or the automotive industry - with the aid of the SAL3D library from Aqsense, various production processes in different branches of industry can achieve significantly higher quality levels without interfering with the short cycle times. This results mainly from the rapid processing of 3D information at high data rates. Even minor defects on object surfaces or deviations from production specifications are detected, analyzed and documented without contact at production speed.
Contact
Aqsense SL
C/Pic de Peguera 15
17003 Girona
Spain
+34 (0)972 183215

